Showing posts with label kvm. Show all posts

Saturday, July 21, 2012

KVM VFIO

1. Download source

1.1 Download linux-vfio kernel source
$ git clone git://github.com/awilliam/linux-vfio.git
1.2. Download qemu-vfio
$ git clone git://github.com/awilliam/qemu-vfio.git iommu-group-vfio

2. Compile and install

2.1 Compile qemu
$ ./configure --prefix=/usr
$ make
$ sudo make install

2.2 Compile kernel
# make menuconfig
IMPORTANT: Mark VFIO related options as , which means make them removable modules, not builtin modules. (Because you might need to reload them in the future.)
# make
# make modules_install install

3. Run kvm 

Start kvm with usual command plus :
# kvm ... -device vfio-pci,host=01:00.0,id=hostdev0

Error:
Failed to set iommu for container: Operation not permitted Failed to setup container for group 1

Solution[1]:
Check dmesg, it's probably complaining about no interrupt remapping support. If so:
# modprobe -r vfio_iommu_type1
# modprobe vfio_iommu_type1 allow_unsafe_interrupts=1

[1] http://www.mail-archive.com/kvm@vger.kernel.org/msg73068.html

Thursday, July 19, 2012

HowTo - KVM Passthrough

1. Install Qemu-KVM [1]

1.1 Enable the virtualization setting in the BIOS first.

1.2 Check KVM installation environment.
$ sudo apt-get update

$ sudo apt-get install cpu-checker

$ sudo modprobe kvm_intel

$ sudo modprobe kvm
$ kvm-ok

1.3 If everything is okay, you can install the qemu-kvm packages.
$ sudo apt-get install qemu-kvm libvirt-bin ubuntu-vm-builder bridge-utils

$ sudo adduser `id -un` libvirtd

$ sudo chmod 777 /var/run/libvirt/libvirt-sock

$ sudo chown root:libvirtd /dev/kvm

$ virsh -c qemu:///system list

1.4 If the command below shows you an empty list of virtual machines, the installation is successful. You may now install the virt-manager. which is the GUI tool for KVM.
$ sudo apt-get install virt-manager

2. Enable IOMMU support

$ sudo vi /etc/default/grub
  • Add intel_iommu=on in GRUB_CMDLINE_LINUX_DEFAULT parameter.
$ sudo update-grub

$ sudo reboot

You can verify the IOMMU support by type in
$ dmesg | grep -e DMAR -e IOMMU

If you are using an Intel machine. For AMD, check here.

3. Modify KVM kernel [2]

I skipped this step.

4. Verify the PCI that you need to attach to the virtual machine.

$ lspci

Suppose we are interested in passing through this device
20:00.0 VGA compatible controller: Advanced Micro Devices [AMD] nee ATI Caicos [Radeon HD 6450]

which is a PCI-Express Graphics Card. This PCI device 20:00.0 will be the example device in the following steps.

$ lspci -n
...
20:00.0 0300: 1002:6779
...

Note down the device ID 1002:6779 .

5. Unbind and bind

5.1 Load the PCI stub module.
$ sudo modprobe pci_stub
5.2 Unbind the device from the host kernel driver, and bind it with pci stub.
# echo "1002 6779" > /sys/bus/pci/drivers/pci-stub/new_id
# echo 0000:20:00.0 > /sys/bus/pci/devices/0000\:20\:00.0/driver/unbind
# echo 0000:20:00.0 > /sys/bus/pci/drivers/pci-stub/bind

6. Assign device
Add extra parameters as below after the usual kvm command.

$ kvm ... -device pci-assign,host=20:00.0

If you see errors, check the following section.

7. Necessary permission modifications [3]

According to my experience, you might encounter an error saying:
Device 'pci-assign' could not be initialized.

Before you try any solution, first make sure that modules such as kvm, kvm_intel, pci_stub are loaded. Also make sure that intel_iommu=on is in your grub configuration file (even if you see IOMMU from dmesg, it doesn't ensure that INTEL_IOMMU is enabled).

The command that fixed it was:
# echo 1 > /sys/module/kvm/parameters/allow_unsafe_assigned_interrupts

But I did try something else before the command above, so I suppose that if this command doesn't work, try the following:
# vi  /etc/libvirt/qemu.conf

Uncomment and set user and group to "root".
Set clear_emulator_capabilites = 0 .
Set relaxed_acs_check = 1 .

Besides, if you are using a RPM-based system such as Fedora, you also need to set SELinux to  permissive.

Then run kvm under root.
# kvm ... -device pci-assign,host=20:00.0


8. Done.

In the guest OS, run lspci, and check if you can see the assigned pci device there.


[1] https://help.ubuntu.com/community/KVM/Installation
[2] http://www.linux-kvm.org/page/How_to_assign_devices_with_VT-d_in_KVM
[3] http://comments.gmane.org/gmane.comp.emulators.libvirt.user/2945

Wednesday, July 11, 2012

HowTo - Using Perf KVM to trace KVM

1. From guest OS: (Android-x86 for example)

$ cat /proc/kallsyms > /sdcard/guest.kallsyms
$ cat /proc/modules > /sdcard/guest.modules

2. Pull out the two files above via adb.

3. On the host OS:

3.1 Record

# perf kvm --host --guest --guestkallsyms=guest.kallsyms --guestmodules=guest.modules record -a

(The record will be saved to perf.data.kvm file under current directory.)

3.2 Report

# perf kvm --host --guest --guestkallsyms=guest.kallsyms --guestmodules=guest.modules report -i perf.data.kvm


Ref:

Error: adb unable to connect xxx.xxx.xxx.xxx:5555

I had this problem when I tried to adb connect to the virtual phone in KVM. You might also have this problem using the emulator.


Solution:

Step 1. Don't panic, if you have tried methods like "setprop service.adb.tcp.port 5555, stop adbd, start adbd", which didn't work.

Step 2: In the phone terminal, type

# adb remount

Step 3: Try connecting again.

$ adb kill-server
$ adb connect xxx.xxx.xxx.xxx
  ...
  xxx.xxx.xxx.xxx (hopefully) connected.

Step 4: Problem solved.

Tuesday, July 10, 2012

HowTo - Using Simple Tracing in Qemu-KVM


You need to build your own version of Qemu-KVM. Download the qemu-kvm source file.

git clone git://git.kernel.org/pub/scm/virt/kvm/qemu-kvm.git

1. Build qemu-kvm with the 'simple' trace backend: 


$ ./configure --enable-trace-backend=simple && 
   make 

2. Create a file with the events you want to trace: 

$ echo bdrv_aio_readv > /tmp/events 
$ echo bdrv_aio_writev >> /tmp/events 

3. Run the virtual machine to produce a trace file: 

$ kvm -trace events=/tmp/events ... # your normal QEMU invocation 

4. Pretty-print the binary trace file at: 

 ~/qemu-kvm/scripts/simpletrace.py trace-events trace-*


Ref: http://repo.or.cz/w/qemu/stefanha.git/blob_plain/refs/heads/tracing:/docs/tracing.txt

Monday, July 9, 2012

HowTo - Using KVM default tracing tool


1. Install trace-cmd 

The source can be found in the kvm source file home directory. 

2. Suppose you are interested in i/o events, type in:

$ sudo trace-cmd record -e '*io*' virsh 

You can start your virtual machine in virsh. 

3. Use kernelshark to read the record.

$ kernelshark

Friday, July 6, 2012

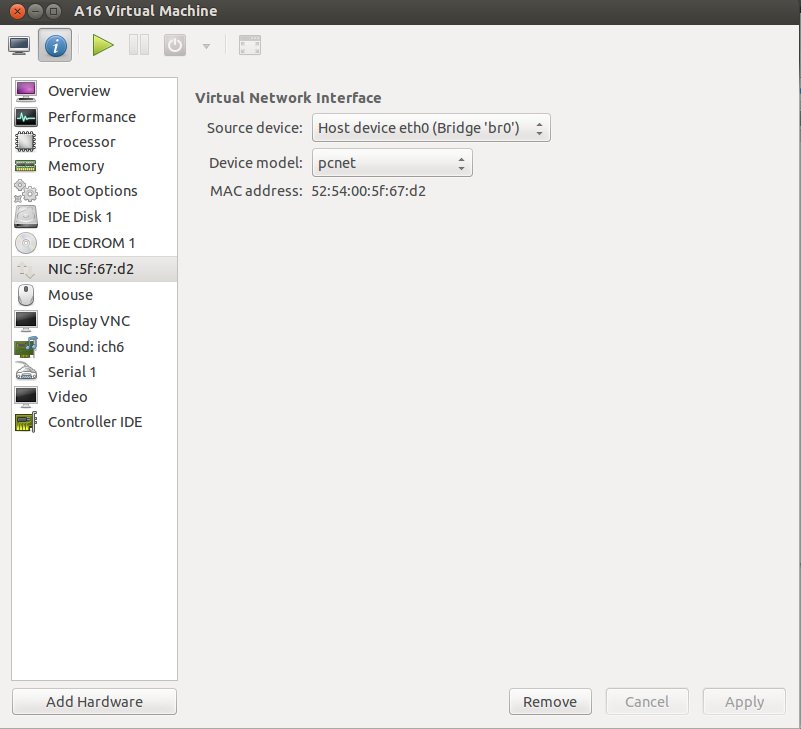
Tips - Android-x86 virt-manager settings

Q: Can't write to disk?
A: Make the Disk to be IDE mode before installation.


Q: Guest OS (Android-x86) no eth0 interface?
A: Set the Network Device Model to be pcnet.


Tuesday, July 3, 2012

HowTo - Porting Android-x86 onto Qemu-KVM

Before you start, you need to install a lot of packages.  Please refer to

https://help.ubuntu.com/community/KVM/Installation

Generating a new virtual machine:

1. Create a file for storing Android-x86 disk image.

$ qemu-img create android-4.0.img 4G


2. Install the system from the cd image (the iso file).
$ kvm -m 2047 -cdrom your_iso_file.iso -hda android-4.0.img -boot d

Install the os to the disk as usual.

After creating a faked SD, do not reboot. Shut down the window.

4. Start the virtual machine.
$ sudo kvm -m 2047 -hda android-4.0.img -net nic,model=pcnet -net tap

For the file size, the numbers matter, so don't be stingy. 

Notice the net model should be pcnet and the second net should be tap. Tap requires root privilege. 

If you don't have a public bridge yet, you need to set up one first. Please refer to 


Briefly, if you are using Ubuntu, the network configuration can be done by doing the follows: (on the host)

# vi /etc/network/interfaces

# Replace old eth0 config with br0
auto eth0 br0
# Use old eth0 config for br0, plus bridge stuff
iface br0 inet dhcp
    bridge_ports    eth0
    bridge_stp      off
    bridge_maxwait  0
    bridge_fd       0
# /etc/init.d/networking restart


On the guest because you are actually using a virtual eth0 device, you need to modify your /etc/network/interfaces file to configure eth0.